
1. Introduction to BMM#
BMM is NIST’s Beamline for Materials Measurement.
At the unix command line, type bsui to start the BlueSky user
interface. bsui is simply an Ipython shell
with some customizations specific to BlueSky. On top of that, there
are a number of customizations specific to BMM.
In this user manual, there are chapters covering most of the chores one will need to do at the beamline, including:
moving motors
changing the state of the photon delivery system
making motor scans
making energy scans
interacting with the beamline’s electronic log book
troubleshooting common problems
1.1. TL;DR#
- Open/close the shutter
shb.open()andshb.close(), see Shutters, Section 7.3- Change energy
Use the
RE(change_edge())command, see Photon Delivery System, Section 7- Sample alignment scans
Use the
RE(linescan())command, see Sample position scans, Section 8- XAFS scan
Use the
RE(xafs())command, see Run an XAFS scan, Section 9.4- Import an automation spreadsheet
Prepare a spreadsheet, then
xlsx(), see Beamline automation, Section 11- Details, details, details
1.2. Essential links#
- NSLS-II:
- BMM’s page:
- Operations schedule:
- Beamtime schedule:
- NSLS Status:
- BMM at Github:
1.3. The user experience#
The Ipython/bsui prompt at BMM is modified to provide at-a-glance information about the state of the beamline.

Fig. 1.1 The BlueSky user prompt at BMM#
The green
BMMindicates that the beamline is set up and ready for the user (see Section 13.1). When the beamline is not ready for users, theBMMstring is red.The string
D.111indicates that the photon delivery system is in mode D (see Table 7.3) and that the Si(111) monochromator (Section 7.8.2) is in use.The green number in square brackets is an incremented count of how many commands have been issued since bsui was started.
If the prompt starts with three red exclamation points – something like
!!! BMM D.111 [1]
that means that some motors were not connected when Bluesky started. Contact beamline staff immediately!
1.3.1. CA Dashboard#
At the top of the some screens, you see a crude-but-handy beamline monitor. It looks something like this:

Fig. 1.2 The CA dashboard beamline monitor#
This provides a concise (but rather color-blind-unfriendly) overview of the state of the beamline.
- Top line
In short, if the top line has no red text, the beamline is all ready to go.
BMM is enabled (green) or disabled (gray)
The BM, FE, & user photon shutters are open (green) or closed (gray)
Indicators that the temperature sensors in the racks are in range (green) or running hot (red)
The state of vacuum sections 1 through 7 – green means vacuum level is OK, yellow means vacuum level is not great but not a problem, red means vacuum level is high
The state of the in-vacuum motors, 4 on the DCM, 2 on the focusing mirror, 2 on the harmonic rejection mirror – green means temperature is OK, red means temperature is high
The open (green) or closed (red) state of the 3 front end gate valves and the 6 beamline gate valves
The open (blue) or closed (gray) state of the liquid nitrogen valve on the roof of the hitch
- Middle line
The energy position of the monochromator
The current element and edge configuration of the beamline
The ring current
The signals on the I0, It, and Ir ion chambers, measured in nanoamps
The current operation at the beamline, options are: idle (white), XAFS scan (pink), line scan (cyan), area scan (yellow), or time scan (blue)
- Bottom line
The positions of several common sample motors
The size of the sample slits
The element currently in the reference position
The state of the instrument being used – in this example, the ex-situ sample wheel
The brown block at the end is a heartbeat monitor to visually verify that the dashboard is functioning correctly
Todo
Document cadashboard in appendix of this manual.
1.3.2. Slack and Data Access#
At the beginning of your experiment, you will be invited to the BMM
Slack workspace. There you can follow along with the progress of the
experiment in the #pass-123456-bmm channel, where 123456 will
be the proposal number of your experiment.
There is also a channel called #pass-123456 which is for use as a
discussion channel.
Throughout the course of the experiment, messages and figures will be automatically posted to that channel. This allows someone to keep track of progress and to keep an eye on data quality without being physically at the beamline.
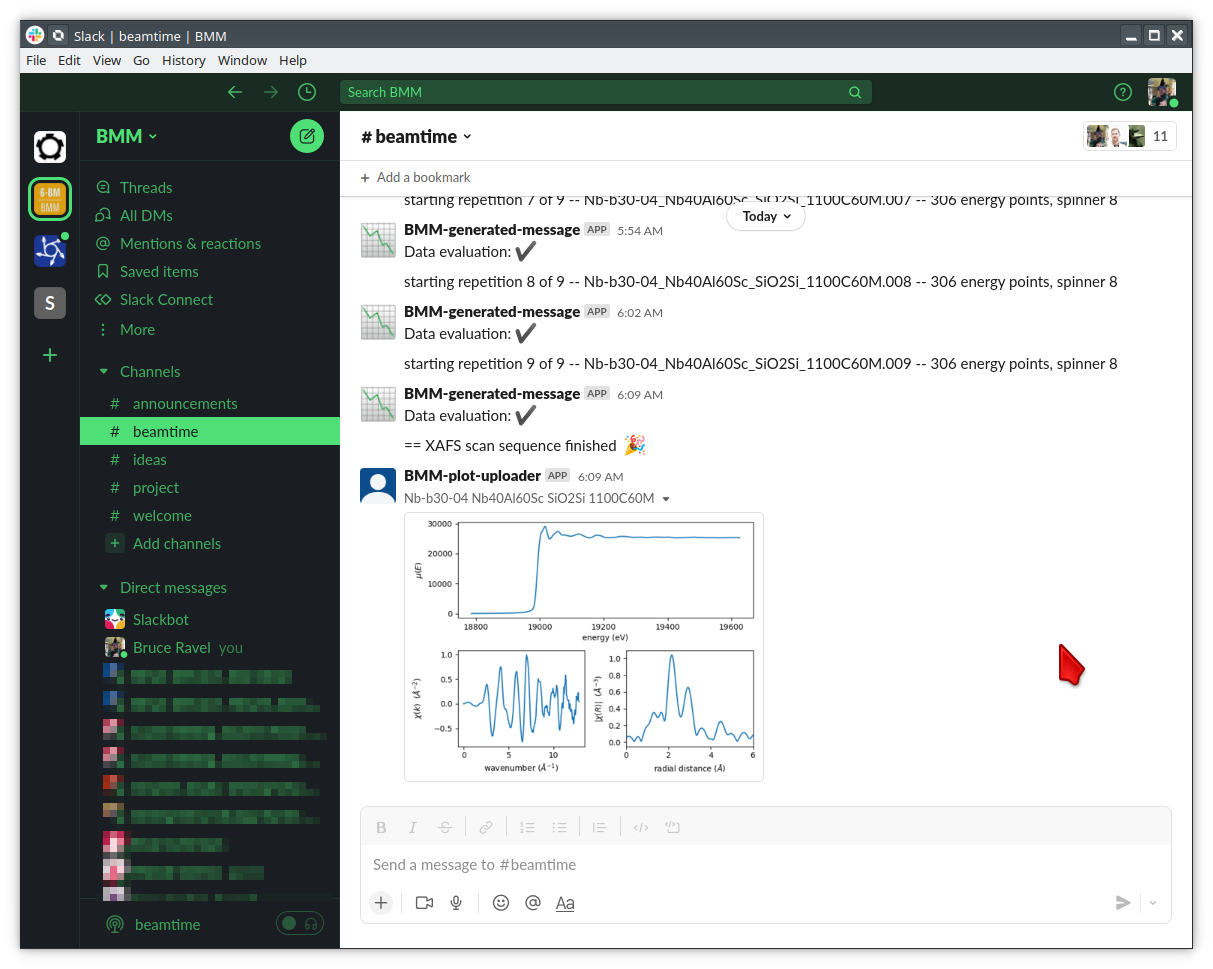
Fig. 1.3 An example of messages and a picture of measured data posted to the beamline Slack channel.#
Attention
As of the 2024-1 cycle, BMM is no longer syncing data automatically to Google Drive. Data are now available to users via sftp with proper authentication. See Data Access (Section 4).
As of the 2025-2 cycle, BMM is using the NSLS-II Slack channels.
The old BMM Slack with the #beamtime channel has been retired.
1.3.3. Getting help at the command line#
To see a summary of common commands, use %h:
Open the shutter:                 shb.open()
Close the shutter:                shb.close()

Change energy:                    RE(mv(dcm.energy, <energy>))
Move a motor, absolute:           RE(mv(<motor>, <position>))
Move a motor, relative:           RE(mvr(<motor>, <delta>))
Where is a motor?                 %w <motor>

Where is the DCM?                 %w dcm
Where is M2?                      %w m2
Where is M3?                      %w m3
Where are the slits?              %w slits3
Where is the XAFS table?          %w xafs_table

Summarize all motor positions:    %m
Summarize utilities:              %ut

How long will a scan seq. be?     howlong('scan.ini')
Run a scan sequence:              RE(xafs('scan.ini'))
Scan a motor, plot a detector:    RE(linescan(<det>, <motor>, <start>, <stop>, <nsteps>))
Scan 2 motors, plot a detector:   RE(areascan(<det>, <slow motor>, <start>, <stop>, <nsteps>, <fast motor>, <start>, <stop>, <nsteps>))
Make a log entry:                 BMM_log_info("blah blah blah")

DATA = /home/bravel/BMM_Data/bucket

All the details: https://nsls-ii-bmm.github.io/BeamlineManual/index.html
and to see a summary of some useful command line hotkeys, use %k:
Abort scan:             Ctrl-c twice!
Search backwards:       Ctrl-r
Quit search:            Ctrl-g
Beginning of line:      Ctrl-a
End of line:            Ctrl-e
Delete character        Ctrl-d
Cut text to eol         Ctrl-k
Cut text from bol       Ctrl-u
Paste text              Ctrl-y

More details: http://readline.kablamo.org/emacs.html
The day will come that we have a GUI for running XAFS experiments at BMM. For now, we have the command line. Read on – it’s not too difficult!
1.4. BMM and Building 743#
BMM is on the south side of the NSLS-II building: what3words: ///width.corrugated.support
You should park at building 743 and enter through the main entrance of 743.
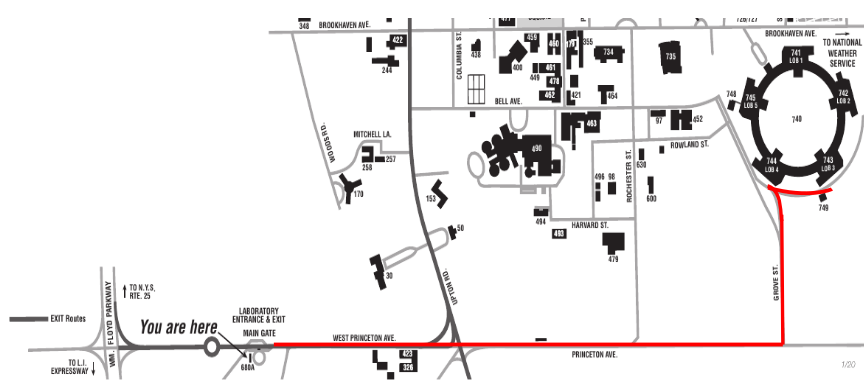
Fig. 1.4 Route from the Main Gate to Building 743#
Walk though the lobby to the doors that lead out onto the experimental floor. BMM is just across the walk way from the doors to the 743 lobby.
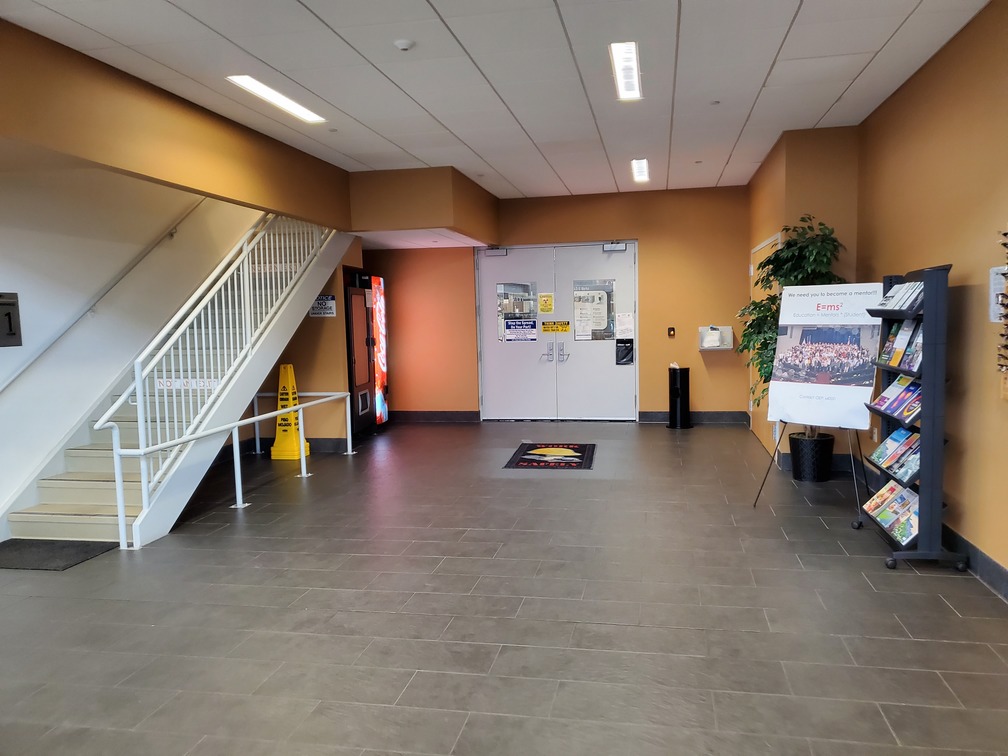
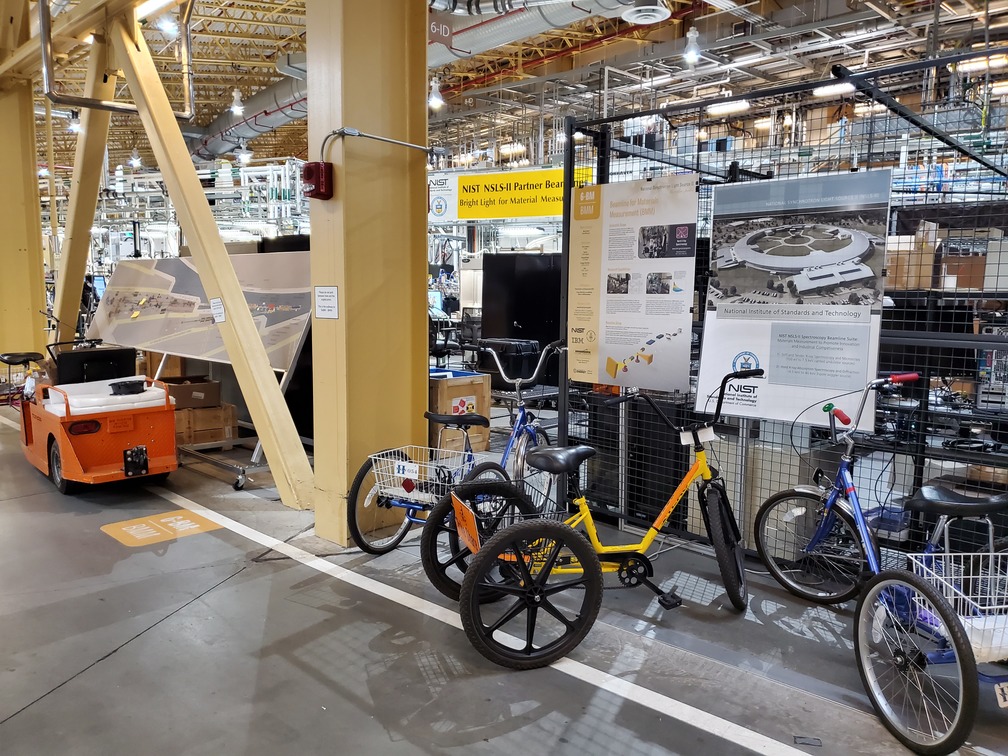
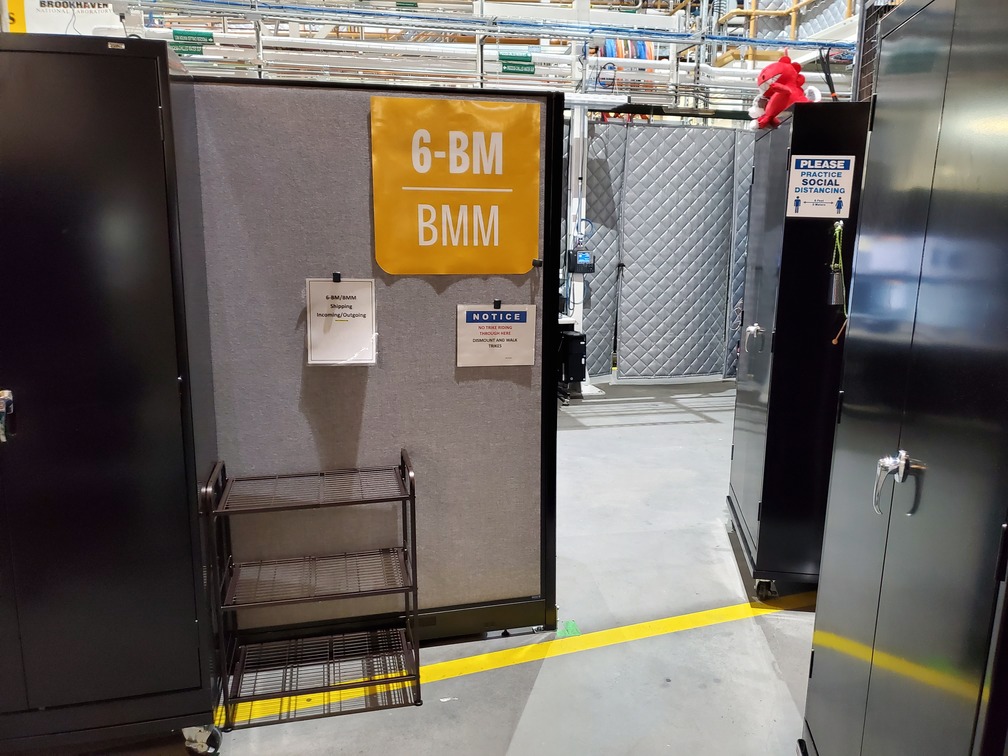
Fig. 1.5 (Left) Approaching the floor through the lobby of Building 743. (Center) BMM is just across the corridor from the door to the 743 lobby. (Right) Walk past the diagonal support beam and head into the BMM control station#
BMM’s staff have offices on the outer hallway of Building 743.
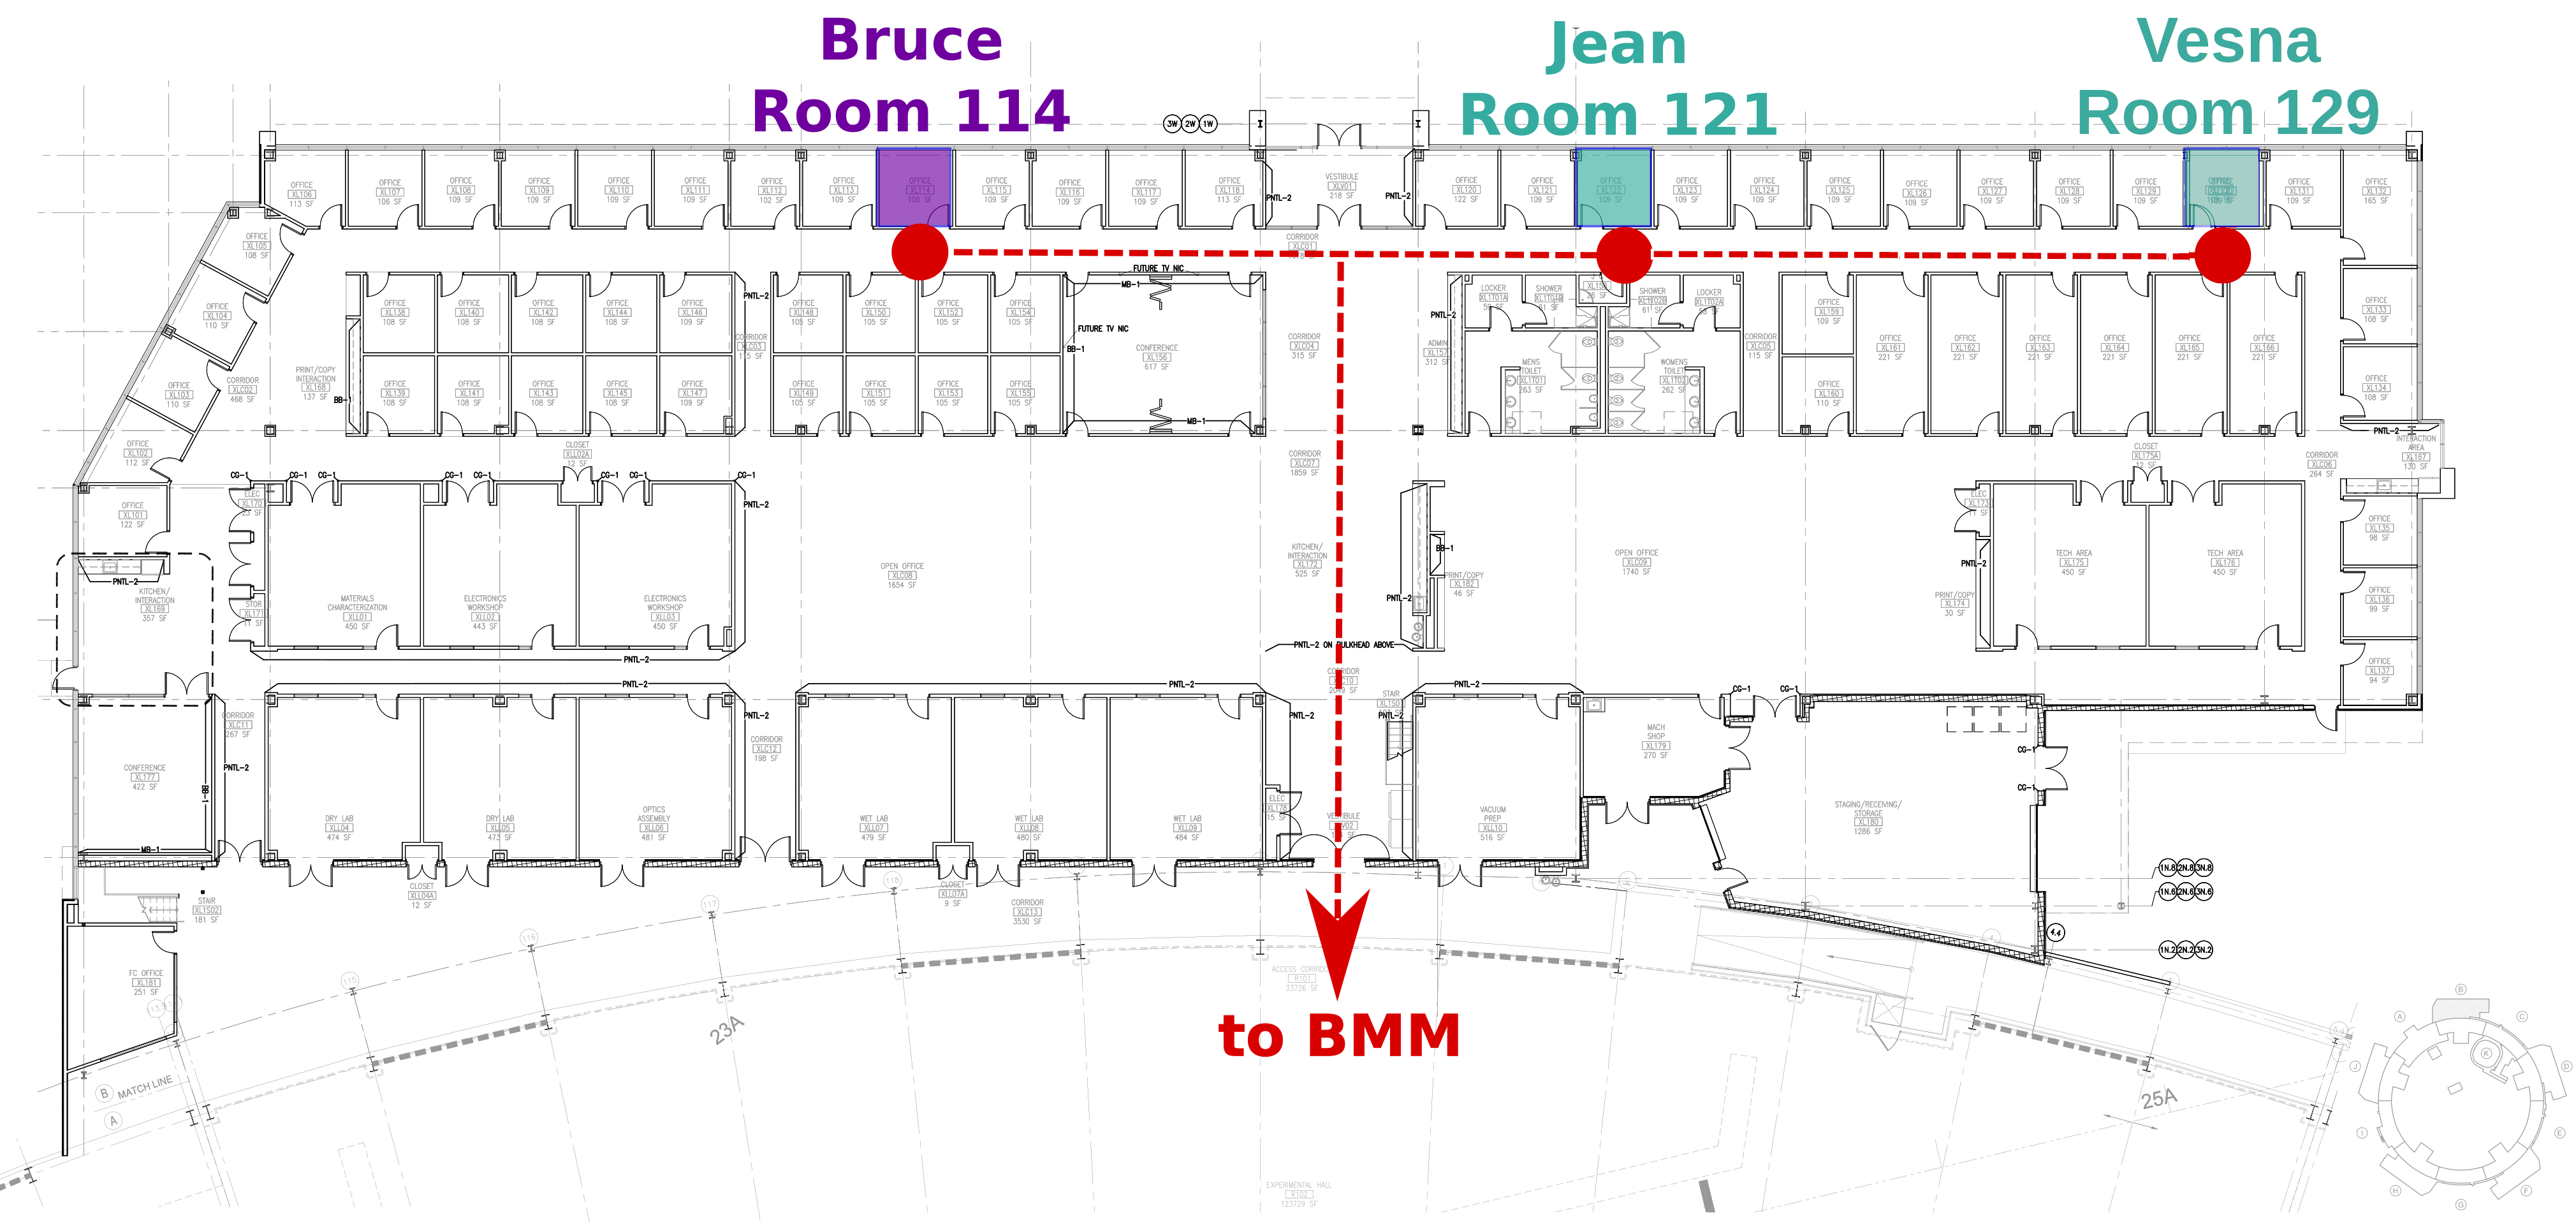
Fig. 1.6 Bruce’s, Jean’s and Vesna’s offices in Building 743#
1.5. A Bit about BMM#
BMM is an XAS beamline. As such it is on the simpler end of things at NSLS-II. We use an NSLS-II three-pole wiggler (3PW) as our photon source. This provides broadband radiation throughout the hard X-ray range, up to about 30 keV. It is a small device – only about 40 cm long and with a magnetic path length of about 12 cm – which is inserted in a short section between the two bend magnets in the dual-bend achromat lattice at NSLS-II. The flux is certainly not the equal of any of the many-pole insertion devices in the straight, but it is highly performant for many XAS experiment.
About 13 meters from the source, we have a paraboloid collimating mirror. This position is well within the storage ring tunnel and about 12 meters from the entrance to the BMM first optical enclosure. We placed a mirror at that location to capture the largest possible swath of the divergent light coming from the 3PW source. A paraboloid is the correct shape for focusing light in both the horizontal and vertical directions. However, a paraboloid must be a fixed figure, fixed angle device in order to optimally collimate the light. Because the mirror is in the front end, thus inaccessible during operations, we found the paraboloid to be an attractive solution. Once aligned in the beam, it should never need adjustment.
The collimated light is delivered to a double crystal monochromator (DCM). The DCM has pairs of Si(111) and Si(311) crystals which are accessed by translating the DCM vacuum vessel laterally (Section 7.8.2) . A transition between the two crystal sets takes about 2 minutes.
After the DCM, we have a toroidal focusing mirror followed by a flat harmonic rejection mirror. One or both of these mirrors is in the beam depending on the configuration of the XAS experiment (Section 7.8.1) in the end station. Because the beam is deflected upward after the collimating mirror, at least one of the mirrors after the DCM must be used in order to deflect the beam through the lengthy transport pipe and into the end station.
Because the collimating mirror is at a fixed angle, it only serves as a harmonic rejection mirror above an energy determined by its operating angle. That turns out to be about 23.5 keV. For XAS experiments conducted above 8 keV, then, the harmonic rejection provided by the collimating mirror is adequate. At lower energies, the flat harmonic rejection mirror is used to provide clean beam.
With just the harmonic rejection mirror in place, a beam of size 8 mm by 1 mm is delivered to the end station. For many XAS experiments, this rather large beam is desirable. Indeed, many of the visitors to BMM specifically request the large beam for their experiments. With the focusing mirror in place, that large swath is reduced to a spot of about 300 μm by 250 μm.
1.6. Acknowledgements#
This documentation project uses Sphinx and the lovely
{book}theme
from the The Executable Book Project. Appendices are numbered properly
using the appendix.py extension from
heig-tin-info/handout.
BMM’s Bluesky profile was mostly written by Bruce. But this would not have happened without the help of several members of NSLS-II’s DSSI program. In particular, I want to thank Dan Allan, Tom Caswell, Josh Lynch, Jakub Wlodek, Max Rakitin, Dmitri Gavrilov, Stuart Campbell, Abby Giles, Garrett Bishof, Nate Maytan, Matt Snyder, Oksana Ivashkevych, and Ryan Jaskiel. And I need to thank every BMM user – being a BMM user means being a beta tester for the beamline software!
BMM makes use of lots of great python tools. Matt Newville’s Larch is used to process every XAS scan that gets measured and Matt’s lmfit is used for many alignment chores.
This manual uses a GitHub action to build and deploy (see details
here)
this document whenever a git push happens. We are grateful to the
UIBCDF
developers for this continuous deployment capability.
1.7. A note about copyright#
This document and the BlueSky data collection profile it covers was developed primarily by a NIST employee. Pursuant to title 17 United States Code Section 105, works of NIST employees are not subject to copyright protection in the United States. Thus this repository may not be licensed under the same terms as Bluesky itself or its documentation.
See the LICENSE file for details.